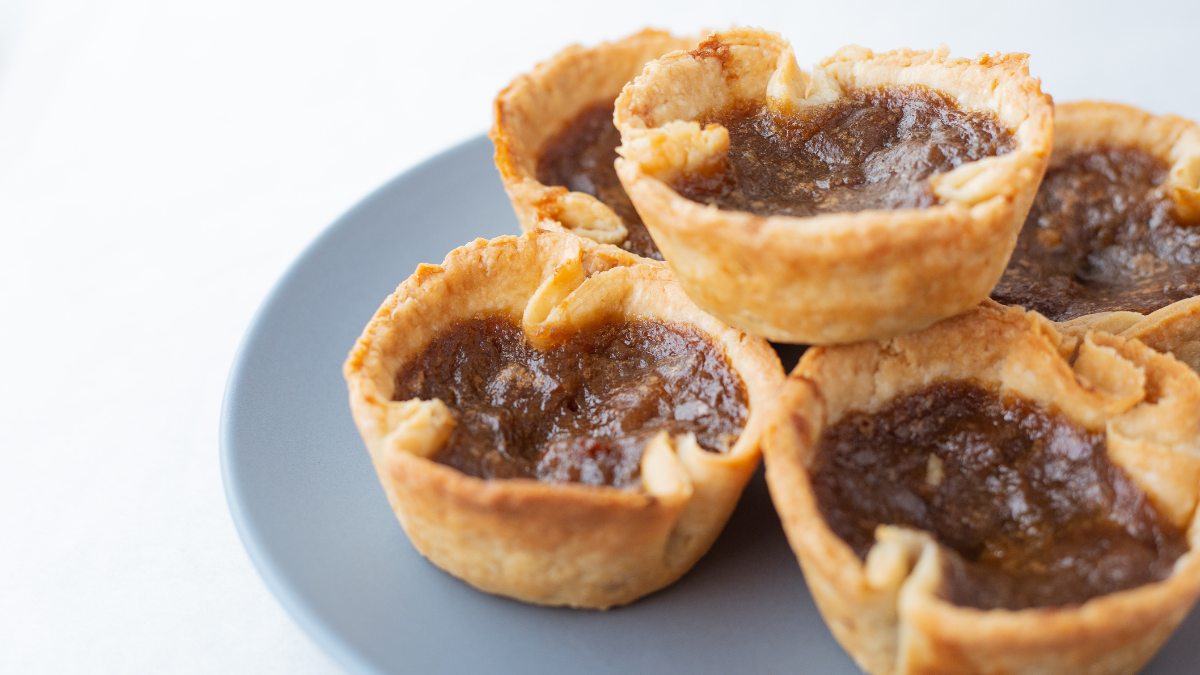
Famous for its flaky dough and gooey filling, butter tarts are a delicious Canadian delicacy that have a particular place in baking tradition. Making these treats from scratch assures you of a rich, buttery experience that fills you with homely charm and nostalgic flavours.
- Ingredients
- Tips
- How to make Butter Tarts
- Assembling
- Decorations
- Troubleshooting
- Flavour Variations
- Pairing and serving suggestions
- FAQ
Ingredients
Pastry Ingredients:
- All-Purpose Flour: Forms the base of the pastry, providing structure and texture.
- Salt: Enhances the flavor of the pastry dough.
Pastry Dough:
- Unsalted Butter: Adds richness and flavor to the pastry while creating a flaky texture.
- Cold Water: Binds the dough together to achieve the right consistency for rolling.
Filling Ingredients:
- Brown Sugar: Offers sweetness and depth of flavor to the filling.
- Corn Syrup: Provides sweetness and contributes to the gooey texture of the filling.
- Melted Butter: Enhances the richness and buttery taste in the filling.
- Eggs: Act as a binding agent and contribute to the structure of the filling.
- Vanilla Extract: Adds aromatic flavor to the filling.
Optional Ingredients:
- Raisins, Nuts, or Both: Add texture and additional flavors to the filling, providing variations to suit personal preferences.
Tips
- Experiment with the filling by adding a touch of maple syrup or a sprinkle of cinnamon for variation.
- Store butter tarts in an airtight container at room temperature for up to 3-4 days for optimal freshness.
How to make Butter Tarts
1. Crafting the Pastry:
- In a bowl, whisk together the flour and salt. Add the chilled cubed butter.
- Using a pastry blender or fork, cut the butter into the flour until it resembles coarse crumbs.
- Gradually add cold water, mixing until the dough comes together.
- Shape the dough into a disc, wrap it in plastic wrap, and refrigerate for 30 minutes.
2. Making the Filling:
- Preheat the oven to 375°F (190°C).
- In a bowl, combine brown sugar, corn syrup, melted butter, beaten eggs, and vanilla extract. Mix until well combined.
- If desired, distribute raisins, nuts, or a mixture of both among the pastry shells.
3. Rolling and Filling the Tarts:
- Roll out the chilled dough on a floured surface and cut circles slightly larger than the muffin tin indentations.
- Gently place the dough circles into the muffin tin to form tart shells.
- Spoon the prepared filling into each tart shell, filling them about three-quarters full.
4. Baking and Serving:
- Bake the butter tarts in the preheated oven for 15-20 minutes or until the pastry turns golden and the filling is set yet slightly jiggly in the center.
- Let the tarts cool in the muffin tin for a few minutes, then transfer them to a wire rack to cool completely before serving.
Assembling
- Prepare Pastry Dough:
- Roll out chilled pastry dough and cut circles slightly larger than the indentations in the muffin tin.
- Form Pastry Shells:
- Gently press the dough circles into each indentation of the muffin tin, ensuring even coverage on the bottom and sides.
- Prepare Filling:
- Mix together brown sugar, corn syrup, melted butter, beaten eggs, and vanilla extract until well combined.
- Fill Pastry Shells:
- Optionally, add nuts, raisins, or other desired fillings to the tart shells.
- Spoon the prepared filling into each pastry shell, filling them about three-quarters full.
- Bake:
- Bake in a preheated oven until the pastry turns golden and the filling is set with a slight jiggle in the center.
- Cool and Serve:
- Allow the baked tarts to cool in the muffin tin for a few minutes before transferring them to a wire rack to cool completely.
Decorations
- Garnishing: After the butter tarts have cooled, you can sprinkle a dusting of powdered sugar or cocoa powder over the tops for a visually appealing finish.
- Whipped Cream: Serve the butter tarts with a dollop of freshly whipped cream on top. It adds a creamy element and visually enhances the dessert.
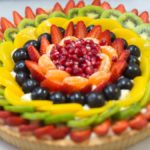
- Fresh Fruit: Add a small slice of strawberry, a raspberry, or a few blueberries on top of each tart before serving for a burst of color and freshness.
- Drizzle of Caramel or Chocolate: After the tarts have cooled, lightly drizzle caramel sauce or melted chocolate over the top for an elegant touch.
Troubleshooting
- Pastry Too Tough or Hard:
- Overmixing the pastry dough can result in tough or hard shells. Handle the dough gently and avoid overworking it. Additionally, ensure the dough rests adequately before rolling it out.
- Filling Overflows or Bubbles:
- Overfilling the tart shells can cause the filling to overflow while baking. Fill the shells about three-quarters full to prevent spillage.
- If the filling bubbles excessively during baking, slightly reduce the oven temperature or cover the tarts loosely with foil after the first few minutes of baking to prevent over-browning.
- Soggy Bottoms:
- To avoid soggy pastry bottoms, ensure the pastry dough is properly chilled before rolling it out. Additionally, do not overfill the tarts, and ensure the oven is adequately preheated for baking.
- Filling Not Setting:
- If the filling doesn’t set properly after baking, it may need additional time in the oven. Bake the tarts for a few extra minutes until the edges of the filling are slightly firm, but the center remains slightly jiggly.
- Uneven Browning:
- If the tarts brown unevenly, rotate the muffin tin halfway through the baking time to ensure even heat distribution.
Flavour Variations
- Pecan Butter Tarts: Add chopped pecans to the filling or place a pecan half on top of each tart before baking for a classic pecan pie-inspired variation.
- Maple Butter Tarts: Substitute a portion of the corn syrup with pure maple syrup for a delightful maple flavor. You can also add a touch of maple extract for a more pronounced taste.
- Citrus Twist: Enhance the filling with grated zest from oranges, lemons, or limes to infuse a bright and refreshing citrus flavor.
- Chocolate Butter Tarts: Mix in chocolate chips or chopped chocolate into the filling for a rich and decadent variation. Alternatively, drizzle melted chocolate over the cooled tarts for added indulgence.
- Coconut Butter Tarts: Incorporate shredded coconut into the filling or sprinkle it on top before baking for a tropical twist.
- Spiced Butter Tarts: Add a pinch of cinnamon, nutmeg, or a blend of warm spices to the filling for a cozy and aromatic flavor profile.
- Nutty Delight: Experiment with various nuts such as walnuts, almonds, or hazelnuts in the filling for a unique nutty taste and texture.
- Fruit Infusion: Mix in dried cranberries, cherries, or diced apples to the filling for bursts of fruity goodness.
- Caramel Butter Tarts: Substitute part of the brown sugar with caramel sauce for an extra gooey and caramel-flavored filling.
- Ginger Infused: Incorporate finely chopped crystallized ginger or ground ginger for a zesty and spicy kick.
Pairing and serving suggestions
Pairing Suggestions:
- Hot Beverages: Serve butter tarts alongside a freshly brewed cup of coffee, hot chocolate, or a flavorful tea, such as Earl Grey or chai tea, for a cozy and comforting pairing.
- Cold Beverages: Pair butter tarts with a glass of cold milk, iced coffee, or a refreshing iced tea for a contrasting yet delightful experience.
- Ice Cream: Serve a small scoop of vanilla ice cream or a dollop of whipped cream alongside warm butter tarts for a contrasting temperature and creamy indulgence.
- Fruit Garnish: Accompany butter tarts with a side of fresh fruit such as strawberries, raspberries, or sliced oranges to balance the sweetness and add a refreshing element.
Serving Suggestions:
- After-Dinner Treat: Serve butter tarts as a delectable dessert after a family dinner or during festive gatherings, allowing guests to savor the sweet indulgence.
- Brunch or Tea Time: Incorporate butter tarts into a brunch spread or as part of an afternoon tea menu, providing a delightful sweet option among other savory treats.
- Holiday Celebrations: Include butter tarts as a festive dessert during holiday celebrations, potlucks, or gatherings, creating memorable moments shared over homemade treats.
- Gifts or Party Favors: Package butter tarts in decorative boxes or gift bags, offering them as thoughtful homemade gifts or party favors for guests to take home and enjoy.
FAQ
Q: Can I freeze the butter tarts?
Yes, you can freeze unbaked butter tarts. After assembling, freeze them on a baking sheet until firm, then transfer to a freezer bag or container. Bake them directly from frozen, adding a few extra minutes to the baking time.
Q: How long can I store homemade butter tarts?
Homemade butter tarts can be stored in an airtight container at room temperature for up to 3-4 days. For longer storage, refrigerate for up to a week or freeze for up to 2-3 months.
Q: Can I make the pastry dough in advance?
Absolutely! Prepare the pastry dough ahead and store it wrapped in plastic wrap in the refrigerator for up to 2 days or freeze it for longer storage.
Q: How can I prevent the filling from bubbling over while baking?
Fill the tart shells only about three-quarters full to prevent the filling from bubbling over. If needed, loosely cover the tarts with foil after the initial few minutes of baking to prevent over-browning.
Q: Can I substitute ingredients in the filling?
Yes, you can experiment with ingredient substitutions or additions in the filling. For instance, try different nuts, add spices, or substitute part of the sugar with maple syrup for variations in flavor.
Q: How do I know when the butter tarts are done baking?
The butter tarts are done when the pastry turns golden brown, and the filling is set yet slightly jiggly in the centre. They will continue to set as they cool.
Q: Can I make mini-sized butter tarts?
Yes, you can make mini-sized butter tarts by using mini muffin tins and adjusting the baking time accordingly.
Butter Tart Recipe
Equipment
- Mixing bowls
- Pastry blender
- Plastic wrap
- Rolling Pin
- Muffin tin
- Whisk
- Measuring cups and spoons
Ingredients
- 2 cups all-purpose flour
- ½ tsp salt
- ⅔ cup unsalted butter chilled and cubed
- ¼ cup cold water
- 1 cup brown sugar
- ½ cup corn syrup
- ¼ cup unsalted butter melted
- 2 large eggs beaten
- 1 tsp vanilla extract
- ½ cup raisins, nuts, or a mix optional
Instructions
- In a bowl, whisk together the flour and salt. Add the chilled cubed butter.
- Using a pastry blender or fork, cut the butter into the flour until it resembles coarse crumbs.
- Gradually add cold water, mixing until the dough comes together.
- Shape the dough into a disc, wrap it in plastic wrap, and refrigerate for 30 minutes.
- Preheat the oven to 375°F (190°C).
- In a bowl, combine brown sugar, corn syrup, melted butter, beaten eggs, and vanilla extract. Mix until well combined.
- If desired, distribute raisins, nuts, or a mixture of both among the pastry shells.
- Roll out the chilled dough on a floured surface and cut circles slightly larger than the muffin tin indentations.
- Gently place the dough circles into the muffin tin to form tart shells.
- Spoon the prepared filling into each tart shell, filling them about three-quarters full.
- Bake the butter tarts in the preheated oven for 15-20 minutes or until the pastry turns golden and the filling is set yet slightly jiggly in the center.
- Let the tarts cool in the muffin tin for a few minutes, then transfer them to a wire rack to cool completely before serving.
Notes
- Make the pastry dough ahead: After preparing the dough, wrap it tightly in plastic wrap and store it in the refrigerator for up to 2 days. You can also freeze the dough for longer storage. Thaw it in the refrigerator before rolling and shaping.
- Assemble the unbaked tarts: Once you’ve formed the pastry shells and filled them with the butter tart mixture, place the muffin tin in the freezer. Once the tarts are frozen solid, transfer them to an airtight container or freezer bags, separating layers with parchment paper. Freeze for up to 2-3 months.
- When ready to bake, there’s no need to thaw the frozen butter tarts. Preheat the oven as usual and place the frozen tarts directly in the oven. Add a few extra minutes to the baking time, typically 5-10 minutes, until the pastry turns golden brown and the filling is set.